Retro Arcade Box
Last year I built a retro arcade tabletop machine. It was a fun little weekend project. I did a terrible paint job, but the kids loved it—and that was the whole point. I wanted to introduce them to some of the classic games I grew up with and let them battle it out in Street Fighter II.
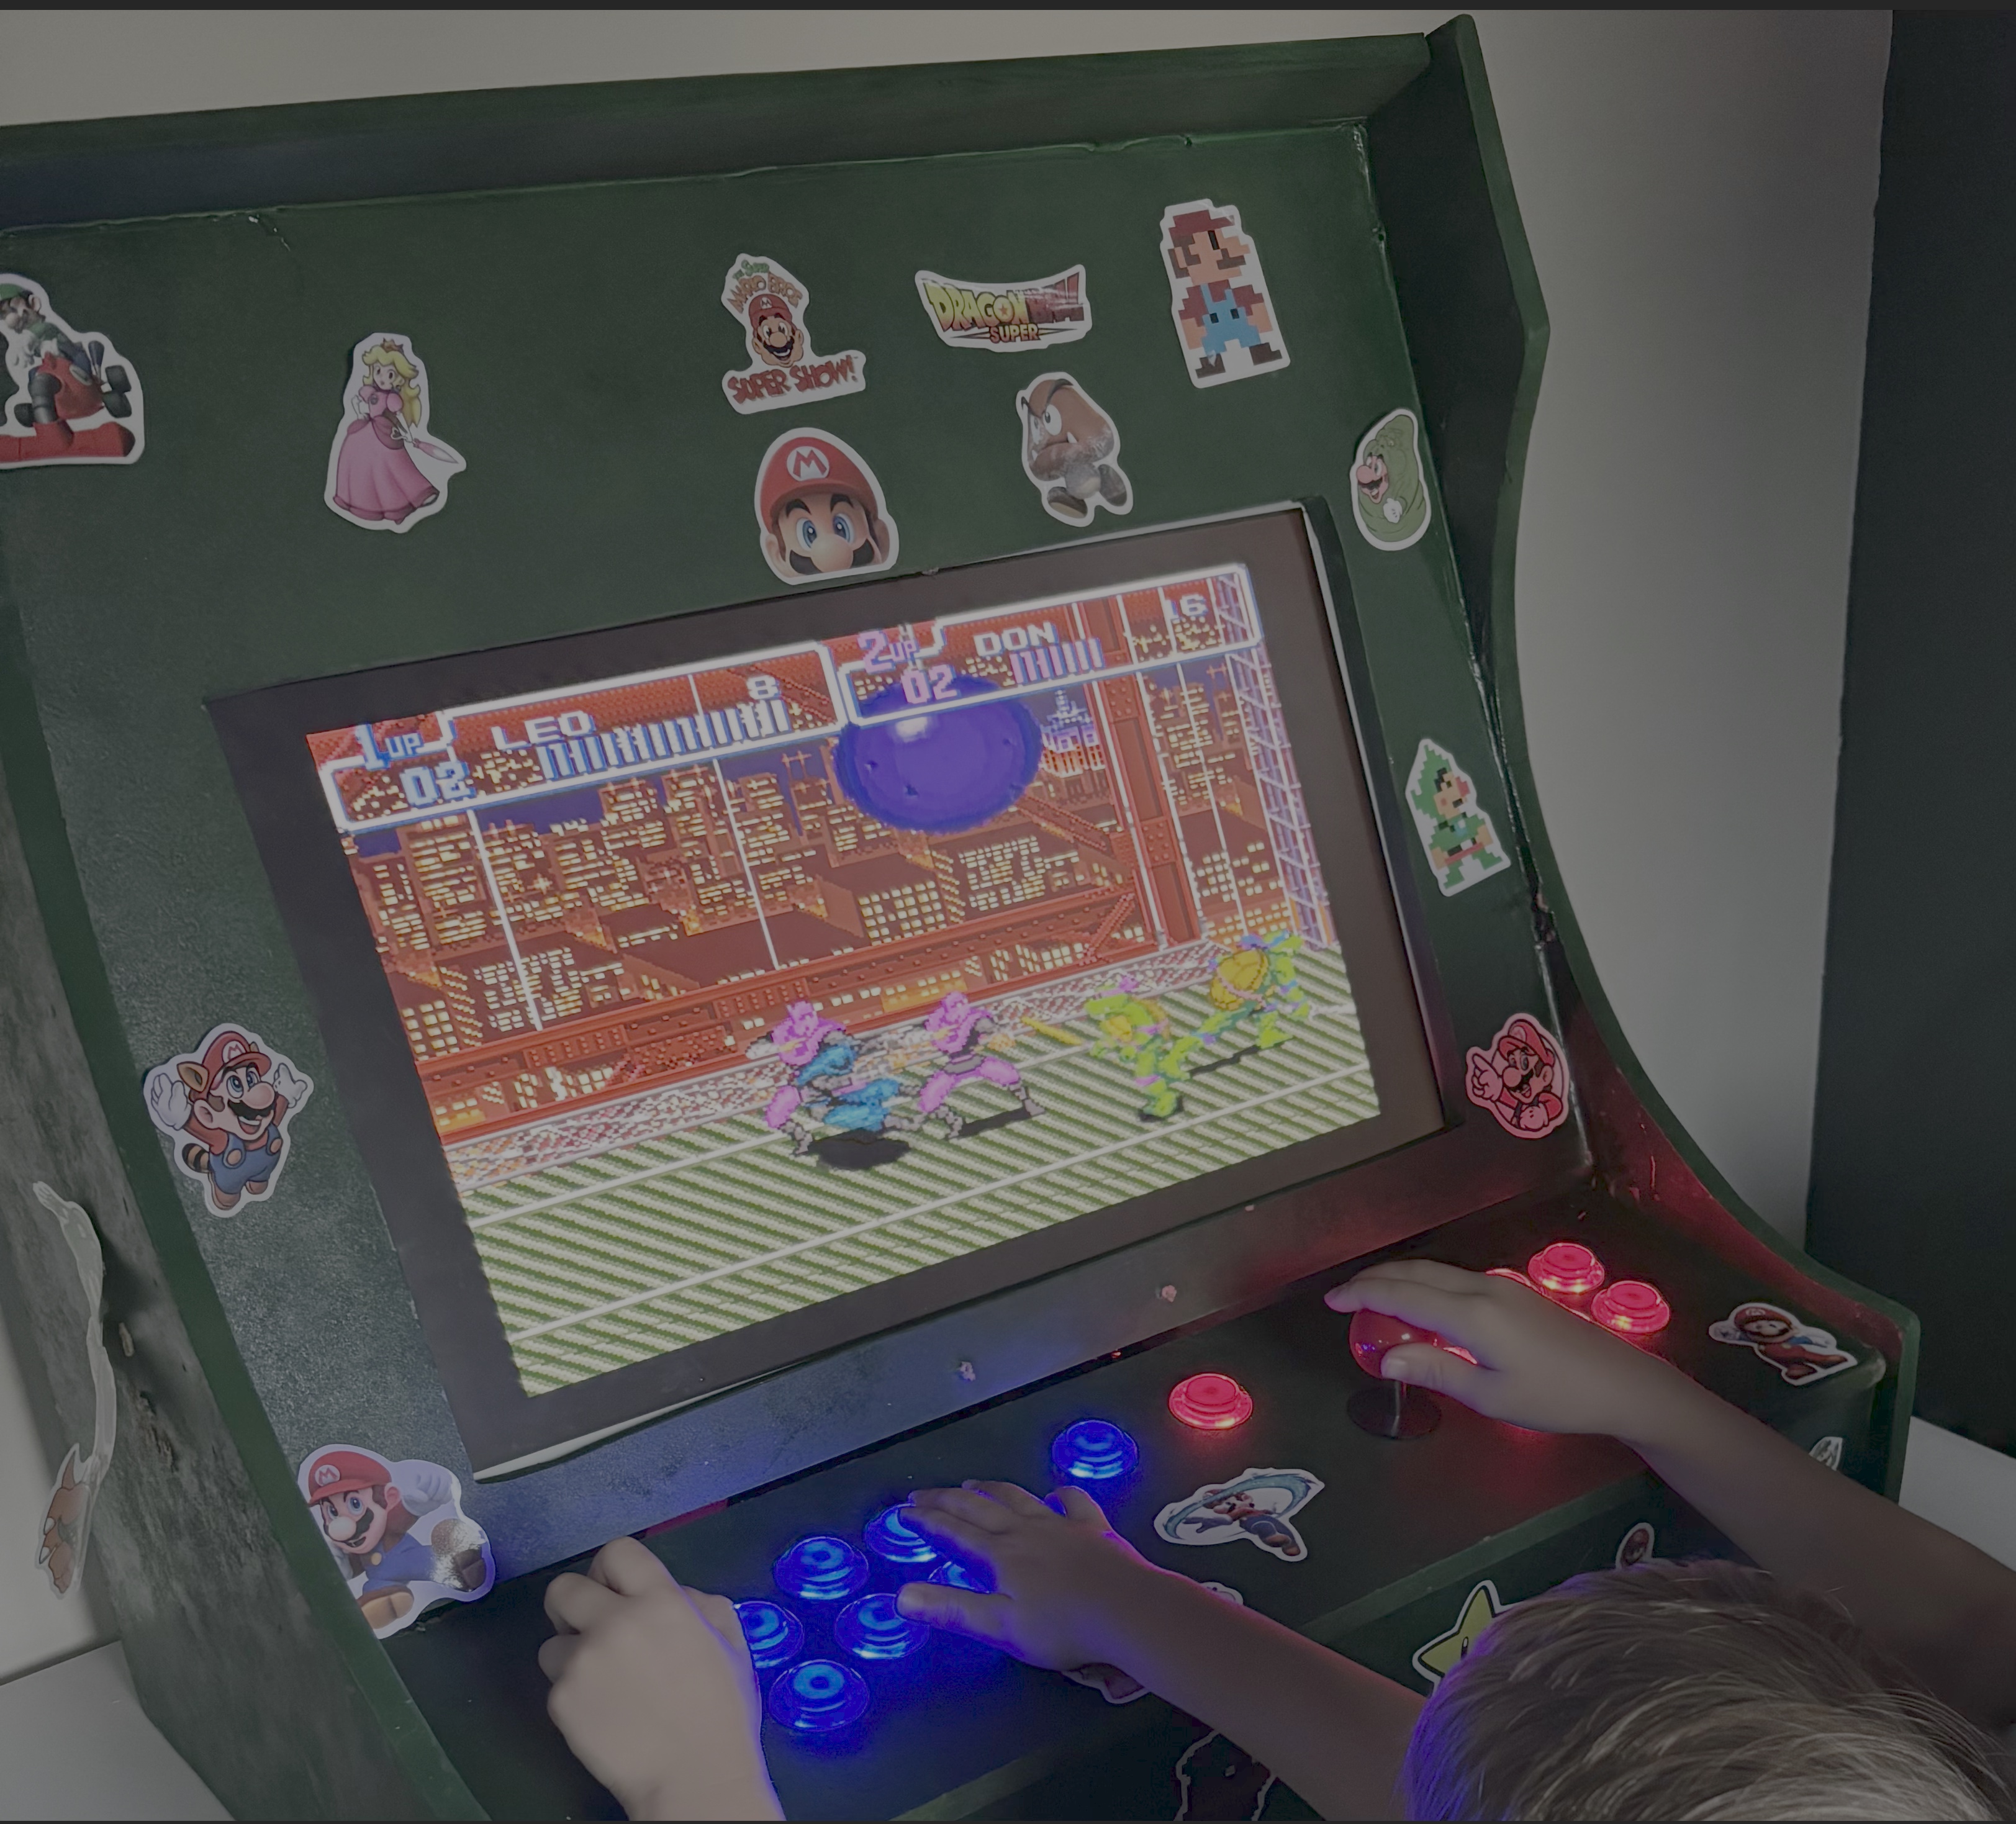
I enjoyed playing on it too, at least for a while. Unfortunately, thanks to my questionable woodworking skills and my “good enough” attitude, the cabinet ended up with a crooked control panel and probably a few misconfigured buttons. It was also big, heavy, and lived out in the work shed, which the kids rarely visited.
Eventually the monitor died, and I never bothered replacing it. After sitting unused for months, I needed the table it was resting on, so the cabinet came down and spent a few more months sitting on the floor—unplugged and forgotten.
This summer I decided to give it a second life by redesigning it into something we could actually use inside the house.
Taking the cabinet apart turned out to be much harder than I expected. The wood glue and what felt like a million nails refused to let go, so I ended up ripping several MDF panels apart. That completely ruined my original plan of simply trimming down the cabinet by cutting off part of the back and one side.
Once the wooden structure became unusable, I salvaged the electronics and the control panel, then tossed the rest into the trash—in many, many pieces.
At first I thought about turning the control panel into a simple box, but I didn’t have enough MDF left. That got me thinking: why not build a small DIY retro console instead? It could plug into any TV or monitor, and it would be much easier to store.
While wandering through IKEA, I came across some storage boxes with bamboo lids. They looked like the perfect surface for mounting the arcade controls, and honestly, they looked pretty nice too. Since they came in multiple sizes, I bought two small and two medium boxes just to experiment. The medium ones turned out to be too large for a single player but too cramped for two players. The small boxes, however, were just right.
The build itself was fairly straightforward. I traced the layout from the old control panel onto the bamboo lids and carefully drilled all the holes. The bamboo came out looking great. Drilling the plastic boxes underneath was a little trickier—they cracked slightly—but, as usual, they were “good enough.”
The final challenge was fitting all the electronics inside without anything pressing against the controls. After plenty of cable wrangling, I finally had a working arcade console.
There are two controller boxes.
Player 1’s box contains the Raspberry Pi, the controller board, USB-C power input, a USB-A port for the second controller, and an HDMI output through the back. Everything fits… barely, but it works. To play, you simply plug in power via USB-C, connect the HDMI cable to the TV or monitor, and you’re ready to go.
Player 2’s box is much simpler. It contains another controller board and a USB-A cable that connects directly to Player 1’s box. As soon as it’s plugged in, it automatically joins the system. I also stored the Raspberry Pi’s power adapter inside this box, so it has an important job even when no one’s using the second controller.
Both boxes have six-foot cables that tuck neatly inside when not in use. The result is two compact little arcade controllers that are easy to store in the kids’ room and quick to hook up to the monitor on their desk.
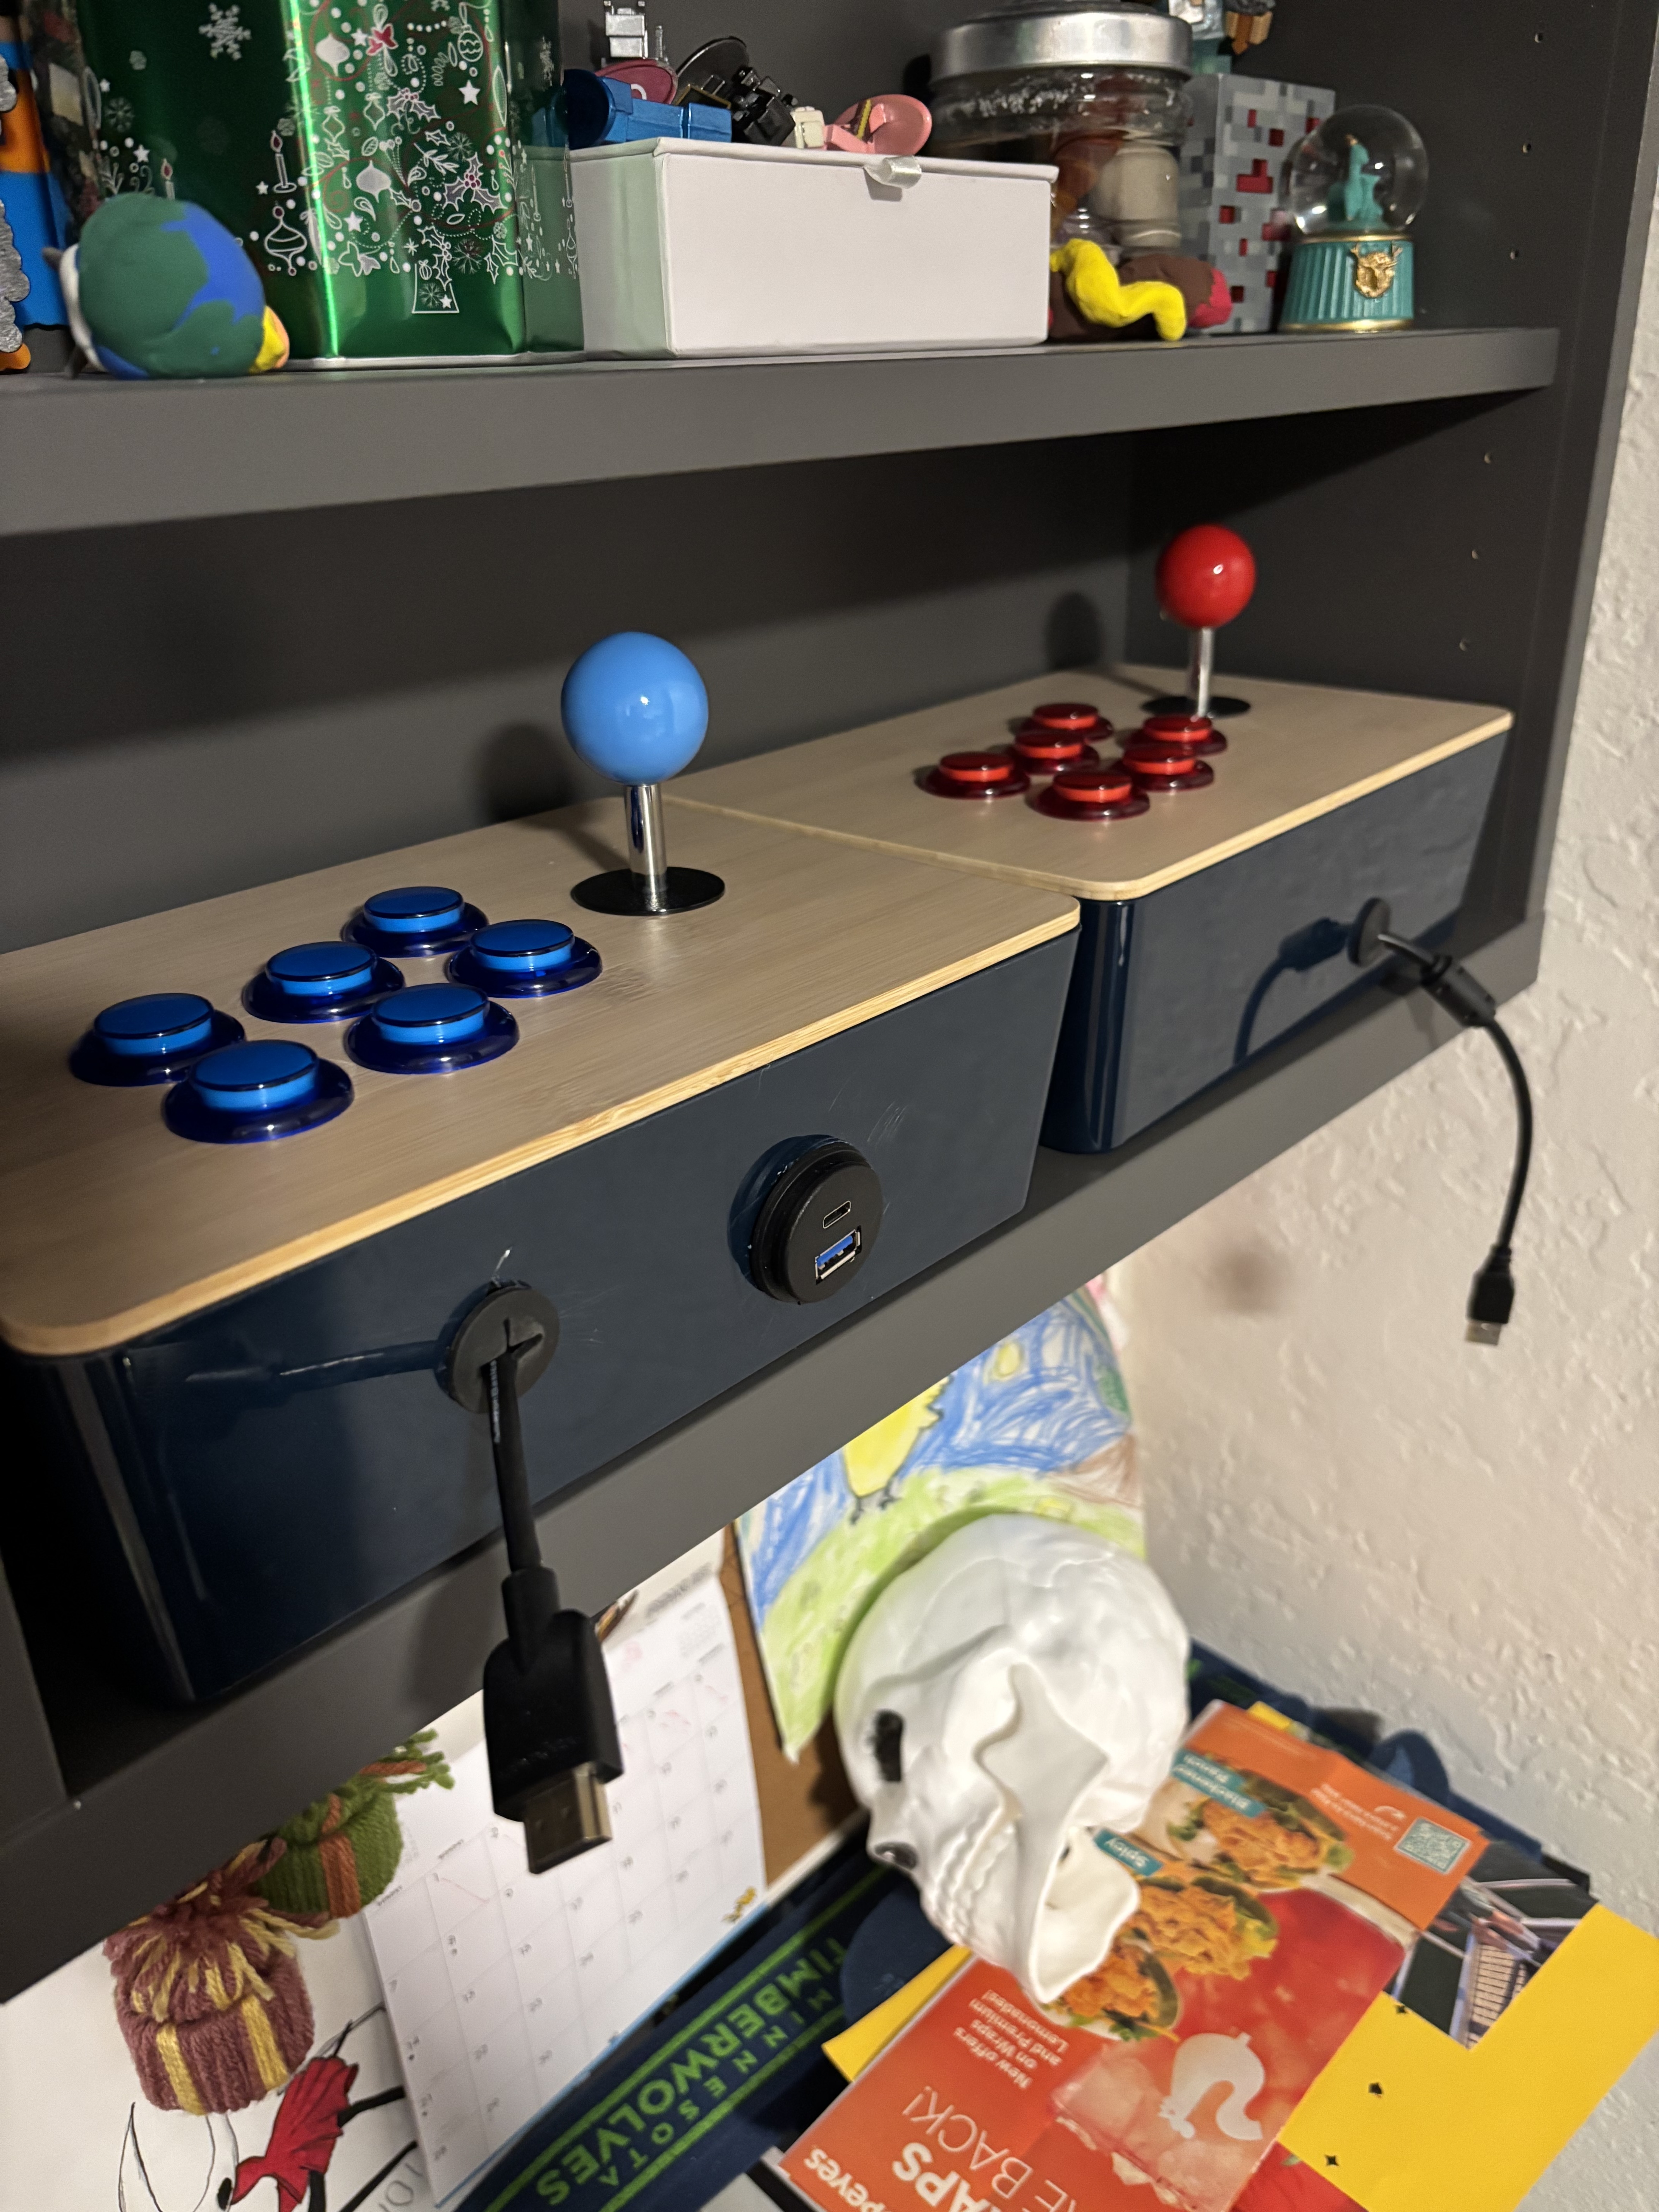
We tested the finished build and somehow ended up playing for nearly an hour. A few days later, the kids asked if we could play again.
That alone made the whole project worth it.
Now we just need to find more games!